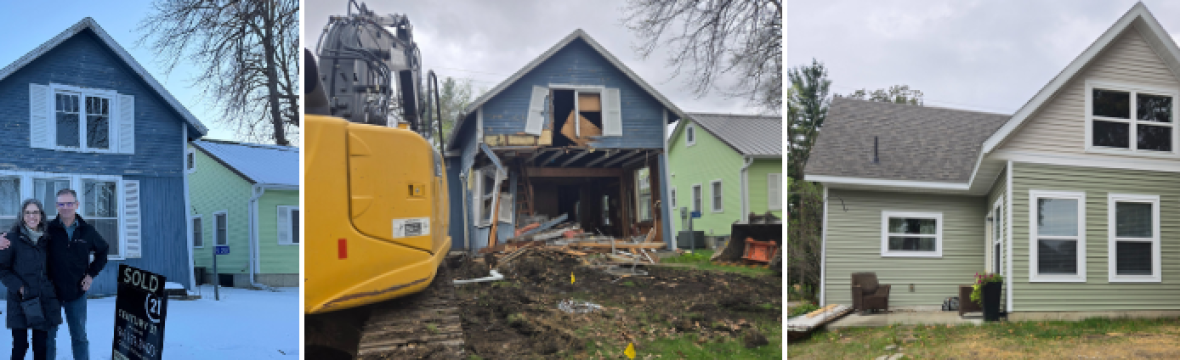

It’s hard to believe, but it has officially been one year since Demo Day.


If you’ve been following along since the beginning, you know this hasn’t been a standard cosmetic flip. This property actually started out as an old church camp cabin. Ultimately, due to the condition of the original structure, we had to make the massive decision to completely knock it down and rebuild. (If you want to read about that, click here)
When you are dealing with a structure that was originally designed for summer camp bunk beds rather than everyday living, the layout can be… interesting. When you are in the thick of renovations—covered in dust, arguing with a tape measure, and questioning your life choices—it’s easy to lose sight of why you started. So, to celebrate our one-year demo anniversary, I thought it was time to step back and look at the big picture.


Today, I’m sharing our original blueprints next to our new layout to show exactly why we made the massive changes we did. It wasn’t about making a “fancier” house; it was about fixing a choppy camp layout and making this cabin actually function for real life. (and by building the cabin on a cement foundation with radiant heat floors, we are now able to use the cabin year round so that added so much more to the liveability!)
Here is a look at the “Before” and “After” of our floor plan, and the four biggest problems we had to solve. (windows are highlighted in yellow)
1. The Staircase Hazard (Safety First!)
If you look at the original layout, the stairs were pressed right up against the front windows. And let me tell you, calling them “stairs” is generous—they felt more like a steep ladder. Not only did they completely block our front view, but they terrified me. I constantly worried that someone was going to slip and go crashing straight through the glass!
Moving the stairs to the center of the home and creating a proper switchback with a landing was a non-negotiable. It opened up our front windows completely and, most importantly, gave me peace of mind. (Read about how we finished the stairs here) We still need to add a railing, but that will come soon enough!


2. Natural Light
If you look at the yellow highlights on the blueprints, you can see where the original windows were versus where they are now. The original camp cabin had many windows in the living room but awkwardly placed making the space feel dark and enclosed. The front windows also used to be part of a screened in porch that was later enclosed to make the living room larger (but the windows were never replaced so they were thin planes of glass with no screens).
I really wanted to replicate the windows so I designed them the same size 3’x5′ but placed them evenly around the room! We reconfigured the Great Room so that windows wrapped around three sides evenly, left the first 6 feet of the upstairs open to below so the upstairs window would shine additional light, and we added significant natural light to the Master Bedroom with a sliding glass door. It completely changed the vibe from a dark cabin to a bright, airy retreat that brings the outside in. (Read to learn about how we repurposed the original upstairs floors for that gorgeous shiplap wall seen in the middle photo below)


3. Creating a Kitchen That Actually Works
The old kitchen was a narrow 7×12 space that felt more like a hallway pass-through than a place to cook. By widening the footprint by just two feet and changing the layout, we created a 9×12 U-shaped kitchen. In the original plans you see that the “addition” that was added for the kitchen & bath was divided equally. We used the same part of the house for the 2 rooms, but gave more space to the kitchen rather than dividing equally. Although I wanted a door like the original cabin had, Mike convinced me we wanted more cabinet space VS. another door.
It sounds like a small difference on paper, but those two extra feet gave us actual counter space and a functional “work triangle.” Now, cooking at the cabin feels like part of the vacation instead of a cramped chore. (not that we ever cooked in the other…it was demolished before we ever turned on power). The kitchen is still in progress but we are able to use it! We were able to save & reuse the original cabinets…read about that here.


4. Right-Sizing the Rooms
The original main floor bedroom at a tiny 8×9. If you’ve ever tried to fit a bed in an 8×9 room, you know it basically functions as a walk-in closet with a mattress. We had planned on having a futon there so you could walk around the room if the bed wasn’t in use. We were going to use the entire open room upstairs for our main bedroom and leave the tiny one for guests (sorry, guests!)
Frank also made the house a little bit longer (again using full boards rather than cutting them) and by not making the living room any larger, we were able to create a comfortable 12×12 Master Bedroom. We also put the entrance to the bedroom in the hall rather than the living room.
For us, the new build wasn’t about having a massive house (not in our budget anyway)-it was simply about right-sizing the rooms so the square footage is used where we actually live and relax. (And since we moved the bathroom to the back of the house instead of the front, the bath is right across from the bedroom.)
We also maximized the smaller sized bathroom by having no wasted space (unlike the original on the left) Read about the reveal here – or the mold here.


Looking at these blueprints and photos side-by-side makes all the dust, sweat, and crazy DIY math totally worth it. The layout finally makes sense.
But as anyone who has ever renovated knows… the floor plans never tell the whole story of the “messy middle.”
Next week, for Parts 2 & 3 of our demo-versary celebration, I’ll be sharing what and how we salvaged items before the demo, the timeline reality checks, the budget pivots, and our absolute biggest “lessons learned” from surviving a year of renovations. You won’t want to miss it!

2 thoughts on “1 Year Cabin Demo Anniversary (part 1)”